
installing smoothwall 3.0 on a soekris engineering net4801 (part 2)
continued from part 1
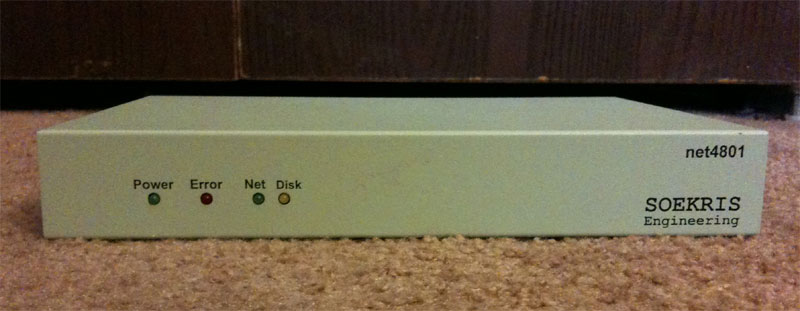
yesterday i received my soekris engineering net4801-60 in the mail. the unit seems to be in good condition and even came with a compactflash card and vpn1411 card which i won’t end up using. i will most likely end up selling the vpn card as i don’t use my smoothwall to create a vpn and the smoothwall os does not have support built into the kernel for a vpn card such as this anyway.
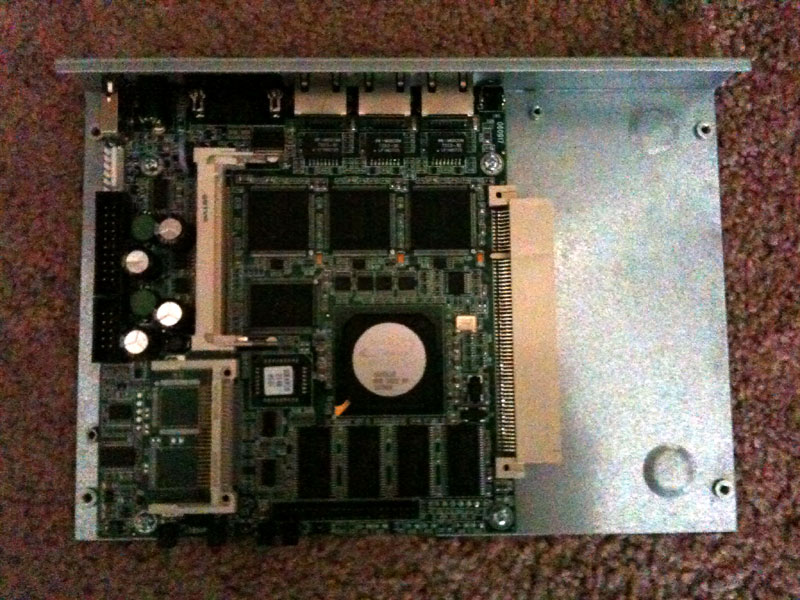
as you can see, it really is just a basic computer. today i received the last parts that i will be needing for this project. they are the hard drive mounting kit and the power supply. i purchased these directly from soekris engineering. in part 1, i prepared the smoothwall install on a 2.5" 60GB laptop hard drive.
the next step is to install the hard drive on the mounting kit inside the unit. the hard drive connects using four mounting screws on the bottom of the drive. the mounting kit is connected to by unscrewing the four screws which secure the net4801 to the case and placing the mounting bracket on top of the board’s mounting holes and reinserting the screws into the mounts.
now that the hard drive is connected and the unit is closed back up, it is time to test the unit. in order to do that, i am going to fire up minicom on my server which is connected via null modem serial cable to the net4801 and listening on com1. if the unit does not show any activity in the minicom windows, you might want to check out the manual from the soekris download page to make sure that you have configured minicom to use the default settings (19200 baud, 8 databits, no parity, 1 stop bit, no flow control). here is the boot screen that you should see upon powering up the unit:
comBIOS ver. 1.31  20070408  Copyright (C) 2000-2007 Soekris Engineering.

net4801

0256 Mbyte Memory                        CPU Geode SC1100 267 Mhz

Pri Mas  IC25N060ATMR04-0                LBA Xlt 1024-255-63  58605 Mbyte

Slot   Vend Dev  ClassRev Cmd  Stat CL LT HT  Base1    Base2   Int
-------------------------------------------------------------------
0:00:0 1078 0001 06000000 0107 0280 00 00 00 00000000 00000000
0:06:0 100B 0020 02000000 0107 0290 00 3F 00 0000E101 A0000000 10
0:07:0 100B 0020 02000000 0107 0290 00 3F 00 0000E201 A0001000 10
0:08:0 100B 0020 02000000 0107 0290 00 3F 00 0000E301 A0002000 10
0:18:2 100B 0502 01018001 0005 0280 00 00 00 00000000 00000000
0:19:0 0E11 A0F8 0C031008 0117 0280 08 38 00 A0003000 00000000 11

 1 Seconds to automatic boot.   Press Ctrl-P for entering Monitor.
on minicom, the unit shows a ram count and then after a few seconds proceeds to boot. due to the configuration of the kernel smoothwall uses, you can’t see the boot messages (and we didn’t set lilo up to show them even if the kernel supported it). once the unit is ready, it will display a login prompt:
smoothwall
Connected on ttyS0 at 19200 bps
smoothwall login:
from there you need to login using root and the password you set up in the initial configuration. once you login, you will need to reconfigure your smoothwall’s network settings. you do this by running the setup command. on the setup screen, you will want to choose networking, then network configuration type. on the next screen, choose “green + orange + red”. you will then want to choose drivers and card assignments. then choose ok to change settings then choose probe. as it detects the network cards, set them as green, then orange, and red (the order is important). green (internal) is eth0, orange (dmz) is eth1, and red (external) is eth2. make sure the address settings are still correct for your network and your external network is set properly for your ISP.
once that is done, i connect network cables to the net4801 and then reboot the unit. once it reboots, you might want to check to make sure all of your interfaces have ip addresses and have been assigned correctly. if they have not, you will want to re-run setup and check for errors in your configuration. from there, i was able to connect to the web interface and configure my smoothwall. now i am up and running behind my net4801. from looking at my mrtg graphs, i can get an idea of how much less power the net4801 uses. my estimated runtime on battery went from ~30 to ~38 minutes.
and that’s pretty much about it for the setup. if you have any questions, feel free to post them in the comments section.